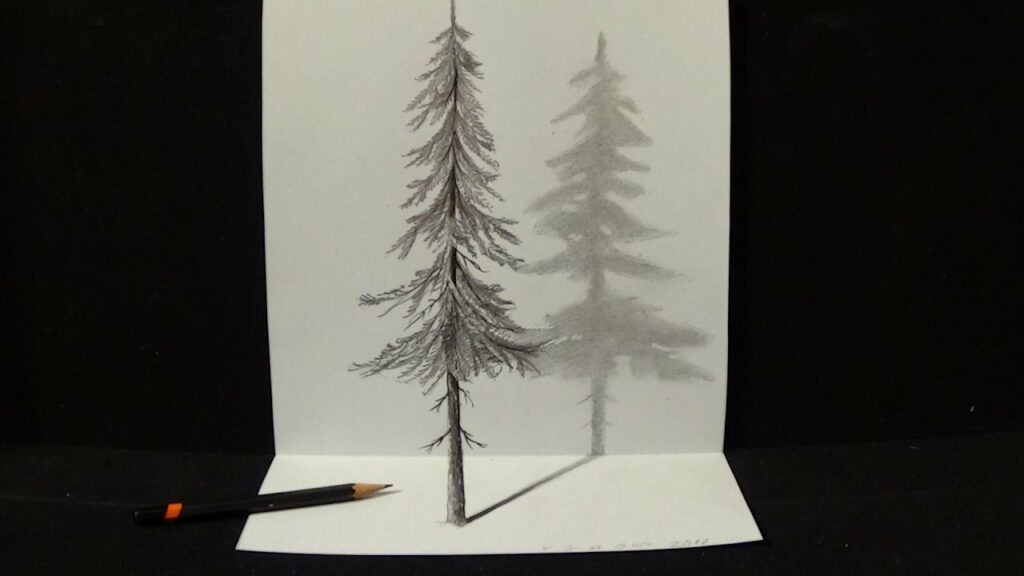
To draw pine trees in pencil, watch tutorials on platforms like YouTube to learn the techniques and steps involved. There are various available videos that can guide you through the process of drawing realistic pine trees using pencil, charcoal, or pen and ink.
Some tutorials provide step-by-step examples, while others offer timelapse videos or demonstrations. By following these tutorials, you can improve your skills in drawing pine trees, whether it’s capturing the details of the leaves, creating a pine cone, or drawing a whole forest scene.
Remember to practice and experiment with different techniques to find what works best for you.

Credit: www.pinterest.com
1. Understanding The Anatomy Of A Pine Tree
Learn the art of drawing pine trees in pencil with step-by-step examples. Discover techniques on how to depict realistic pine trees in sketches and charcoal drawings. Expand your skills and create beautiful tree illustrations.
Pine trees are a common subject for many artists, and learning how to draw them can add a touch of nature and tranquility to your artwork. Before you start sketching, it’s essential to understand the anatomy of a pine tree. By familiarizing yourself with the key features and different species, you’ll be better equipped to capture their unique characteristics.Key Features Of A Pine Tree
Pine trees have several distinctive features that set them apart from other species. Understanding these key elements will help you create more accurate and realistic drawings. Here are some essential features to keep in mind: – Needles: Unlike broadleaf trees, pine trees have long, slender needles instead of leaves. These needles usually grow in bundles or clusters called fascicles. – Branching Pattern: Pine trees exhibit a characteristic branching pattern that often forms distinct tiers or layers. The main upward-growing branches, called the leader branches, give rise to horizontal branches, creating a layered effect. – Trunk: Pine trees typically have straight trunks that extend vertically from the ground. The texture of the bark may vary depending on the species, but it often features rough or scaly patterns. – Cones: Pine trees produce cones as their reproductive structures. These cones can vary in size and shape, with some elongated and others spherical. Pay attention to the proportions and placement of cones on your drawing.Identifying Different Species Of Pine Trees
There are various species of pine trees, each with its unique characteristics. To accurately depict a specific type of pine tree, it’s important to familiarize yourself with the distinguishing features of different species. Here are a few common pine tree species you may encounter:| Pine Tree Species | Distinguishing Features |
|---|---|
| Eastern White Pine | – Long, soft needles in bundles of five- Smooth grayish bark- Tall and slender |
| Lodgepole Pine | – Short needles in bundles of two- Reddish-brown or grayish bark with deep furrows- Cone scales with small prickles |
| Ponderosa Pine | – Long needles in bundles of three- Thick, orange-brown bark with deep puzzle-like furrows- Large, egg-shaped cones |
2. Gathering The Right Materials
Before you start drawing pine trees in pencil, it’s important to gather the right materials. Having the proper tools and materials will make your drawing process smoother and allow you to achieve the desired results. In this section, we will discuss the pencils and erasers suitable for pencil drawing, as well as the different paper types that work well for drawing pine trees.
Pencils And Erasers For Pencil Drawing
When it comes to drawing pine trees, having a good set of pencils is essential. Different pencils provide varying degrees of darkness, allowing you to create depth and texture in your drawings. Here are the pencils you should consider:
| Pencil Grade | Usage |
|---|---|
| 2H – 4H | Use these hard pencils for light outlines and initial sketches. |
| HB – 2B | These medium-grade pencils are suitable for shading and adding details to your pine tree drawings. |
| 4B – 6B | Soft pencils like these are perfect for creating darker shadows and adding depth to your artwork. |
In addition to pencils, you will also need a good quality eraser. A kneaded eraser is recommended for pencil drawing as it can be easily shaped and doesn’t leave residue on the paper. It allows you to correct mistakes without damaging the surface of your drawing.
Paper Types For Drawing Pine Trees
Choosing the right paper for drawing pine trees can greatly impact the final result of your artwork. Here are some paper types that work well:
- Drawing Paper: This type of paper is specifically designed for pencil and charcoal drawings. It has a smooth surface that allows your pencils to glide effortlessly, making it ideal for capturing the fine details of pine trees.
- Watercolor Paper: Watercolor paper offers a textured surface that adds a unique look and feel to your pencil drawings. It can handle pencil marks as well as light washes of watercolor if you want to experiment with mixed media.
- Sketchbook Paper: If you prefer a more portable option, using a sketchbook with medium to heavy-weight paper is a great choice. It allows you to practice drawing pine trees on the go and keep all your sketches in one place.
Remember to consider the weight and texture of the paper based on your preferred drawing techniques and the effect you want to achieve in your pine tree drawings.
3. Mastering The Basic Techniques
Mastering the basic techniques is crucial when it comes to drawing pine trees in pencil. By understanding and practicing sketching guidelines for proportions and shading techniques for depth and texture, you can bring your pine tree drawings to life.
Sketching Guidelines For Proportions
Sketching guidelines are essential for creating accurate proportions in your pine tree drawings. Follow these steps to ensure a well-proportioned and realistic representation:
- Start by lightly sketching the outline of the main trunk. Remember, the trunk of a pine tree is typically straight and slightly tapering towards the top.
- Next, add guidelines for the branches. Pine trees have branches that typically grow in clusters at different heights along the trunk. Use short, diagonal lines to indicate the direction and length of each branch.
- Then, sketch the basic shape of the foliage. Pine needles grow in clusters, so create small, triangular shapes to represent the clusters on the branches. Vary the size and angles of the triangles to mimic the natural growth pattern of pine needles.
- Finally, refine your sketch by erasing any unnecessary guidelines and adding details such as bark texture and additional branches. Pay attention to the proportions and make adjustments as needed.
Shading Techniques For Depth And Texture
Shading is essential for creating depth and texture in your pine tree drawings. Here are some shading techniques to help you achieve a realistic and three-dimensional effect:
- Hatch shading: This technique involves drawing parallel lines in one direction to create shadows and texture. Use hatch shading to add depth to the trunk and branches of your pine tree.
- Cross-hatch shading: Cross-hatching involves creating a second set of parallel lines in a different direction, intersecting with the first set. This technique adds more texture and darkness to the shaded areas of your drawing.
- Stippling: Stippling refers to creating texture by using small dots or stipples. Use this technique to add texture to the foliage of your pine tree. Vary the density and size of the dots to create a realistic effect.
- Blending: Blending involves smudging or blending the graphite with a blending stump or tissue paper to create smooth gradients. Use blending to soften transitions between light and shadow and create a more realistic look.
Experiment with these shading techniques and find the combination that works best for your desired effect. Remember to observe reference photos or real-life pine trees to capture the nuances of shading and texture.
By mastering the basic techniques of sketching guidelines for proportions and shading techniques for depth and texture, you’ll be able to create stunning pine tree drawings in pencil. Practice regularly and keep exploring different techniques to further enhance your skills.
4. Step-by-step Guide To Drawing A Pine Tree
Learn how to draw a pine tree step-by-step with this easy-to-follow guide. Whether you’re a beginner or an experienced artist, this tutorial will teach you the techniques to create realistic pine trees in pencil. Check out the video tutorials on YouTube or follow step-by-step examples with pen and ink.
Happy drawing!
1. Drawing The Trunk And Branches
When it comes to drawing a pine tree, it’s essential to start with the trunk and branches. These are the foundation of your drawing and will determine the overall shape and structure of the tree. To begin, follow these step-by-step instructions:
- Start by lightly drawing a vertical line on your paper. This will be the main trunk of the tree.
- Add branches to the trunk by drawing smaller lines that extend outward. Remember, pine trees have distinct branches that often grow in clusters. Vary the length and angle of the branches to create a natural look.
- Continue adding branches all the way up the trunk, making sure to leave some gaps between them. This will give the foliage room to breathe and create a more realistic effect.
- Once you’re satisfied with the overall shape of the tree, darken the trunk and branches with your pencil. Use bold, confident strokes to give the tree a solid presence.
2. Adding Details To The Foliage
Now that you have the basic framework of the tree, it’s time to add details to the foliage. This will bring your pine tree to life and make it visually appealing. Here’s how to do it:
- Start by drawing small, thin lines at the tip of each branch to represent the needles. Pine tree needles grow in clusters, so make sure to draw them in groups rather than individually.
- Vary the length and direction of the needle clusters to create a sense of depth and dimension. Some should be shorter and closer to the branch, while others can be longer and protrude outward.
- As you move up the tree, gradually increase the density of the needle clusters. The lower branches will have more foliage, while the upper branches may be sparser.
- Don’t forget to add a few loose needles around the base of the tree to represent fallen foliage. This will add realism and make the drawing look more natural.
- Once you’re done with the foliage, go back and darken the trunk and branches even further. This will create a contrast between the tree and its foliage, making it more visually striking.
By following these simple steps, you can create a realistic and detailed drawing of a pine tree. Remember to practice regularly and experiment with different techniques to improve your skills.
5. Enhancing Your Pine Tree Drawing
Enhance your pine tree drawing with these easy-to-follow pencil techniques. Learn step-by-step how to create realistic pine trees using shading and detail. Watch tutorial videos on YouTube for helpful tips and inspiration.
Creating Depth And Perspective
Creating depth and perspective in your pine tree drawing is essential to make it look realistic. By incorporating these techniques, you can give your artwork a sense of three-dimensional space.
- Start by sketching the basic shape of the tree trunk and branches using light, short pencil strokes.
- To add depth, vary the thickness and length of the branches. Thicker and longer branches should appear closer to the viewer, while thinner and shorter ones should recede into the background.
- Use overlapping branches and foliage to create a sense of distance. Overlapping elements suggest objects that are located behind others, giving your drawing depth and dimension.
- To enhance the perspective, make the branches and foliage smaller as they move towards the top of the tree. This technique mimics the way objects appear smaller as they recede into the distance.
Remember to use light and soft pencil strokes to create a smooth transition between the different elements of your pine tree, achieving a more realistic and visually appealing drawing.
Adding Highlights And Shadows
Highlights and shadows are crucial for giving your pine tree drawing depth and dimension. By strategically placing highlights and shadows, you can make your artwork appear more lifelike and create a sense of volume.
- Identify the light source in your drawing. Determine where the light is coming from, as this will influence the placement and intensity of your highlights and shadows.
- Using a sharp pencil, lightly shade the areas of the tree where the light hits directly. These areas will be brighter and should stand out in your drawing.
- To create shadows, darken the areas of the tree that are opposite the light source. Shadows should be darkest closest to the tree trunk and gradually lighten as they move away.
- Blend the highlights and shadows using a blending stump or tissue paper. This will help create smooth transitions between the different values in your drawing.
By incorporating highlights and shadows effectively, you can add depth and realism to your pine tree drawing, making it visually engaging and captivating.
Frequently Asked Questions For How To Draw Pine Trees In Pencil
How Do You Draw Realistic Pine Trees With Pencil?
To draw realistic pine trees with pencil, start by outlining the basic shape of the tree trunk and branches. Add details such as pine needles using short, curved lines. Shade and add texture to create depth. Use references and practice to improve your technique.
What Are Some Sketching Techniques For Drawing Pine Trees?
When sketching pine trees, start by lightly sketching the overall shape of the tree using basic lines. Add branches and then sketch the pine needles using short, curved lines. Use shading and crosshatching to add texture. Practice different techniques to achieve the desired effect.
How Can I Draw A Pine Tree In Pen And Ink?
To draw a pine tree in pen and ink, start by outlining the basic shape of the tree using a pen. Add branches and then use crosshatching to create texture. Use different pen strokes and thicknesses to create depth. Practice and experiment with different techniques to improve your skills.
Conclusion
Drawing pine trees in pencil can be a fun and rewarding artistic challenge. By following the techniques and step-by-step examples provided in this post, you can learn how to create realistic and detailed pine tree drawings. Whether you’re a beginner or have some experience with pencil drawing, these tips will help you achieve impressive results.
So grab your pencil and paper, and let your imagination soar as you bring these majestic trees to life on the page. Happy drawing!

