To draw pine trees easy, you can search for tutorials on platforms like YouTube or Pinterest. There are many step-by-step guides available that teach you how to draw pine trees in a simple and easy manner.
These tutorials will provide you with the necessary instructions and techniques to create realistic pine tree drawings or cartoon versions, suitable for beginners or kids. Additionally, you can find tips on drawing pine trees with pen and ink or using pencil for a realistic effect.
You can also explore different aspects of pine trees, such as drawing pine tree leaves or a pine cone. Whether you are looking to enhance your art skills or create holiday cards, these tutorials will guide you in drawing pine trees effortlessly.
Understanding The Basics Of Pine Trees Drawing
Drawing pine trees might seem challenging at first, but with a few simple techniques, you can easily capture their beauty on paper. Whether you’re a beginner or an experienced artist, this guide will help you understand the basics of drawing pine trees. In this section, we will explore how to differentiate pine trees from other tree types and identify their distinctive features.
Differentiating Pine Trees From Other Tree Types
Pine trees have a unique appearance that sets them apart from other tree types. Understanding the key differences will allow you to draw them accurately. Here are some distinguishing features:
- Needle-like leaves: Unlike many other trees, pine trees have long, thin, needle-like leaves. These needles are usually arranged in clusters and can vary in length depending on the pine species.
- Cone-shaped structures: Another characteristic feature of pine trees is their cone-shaped structures. These cones are often found hanging from the branches and can vary in size and shape.
- Straight, vertical trunks: Pine trees typically have straight, vertical trunks that rise up from the ground. The trunks can be smooth or have a rough texture, depending on the species.
Identifying The Distinctive Features Of Pine Trees
While certain characteristics distinguish pine trees from other tree types, it’s essential to identify their distinctive features to bring your drawings to life. Here are some key features to focus on:
- Branching pattern: Pine trees have a unique branching pattern that often resembles tiers or layers. The branches tend to extend outward horizontally from the trunk, creating a distinctive shape.
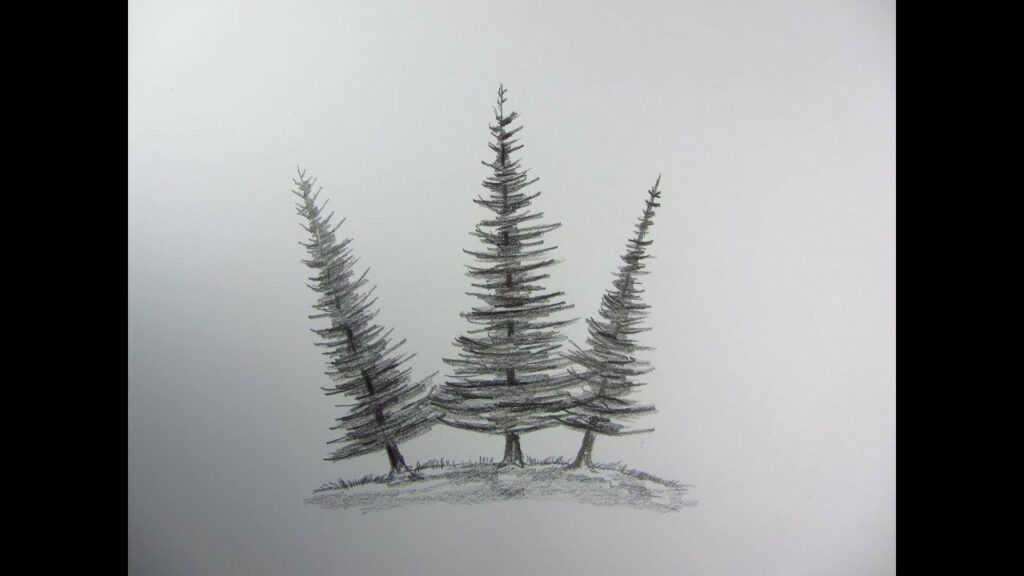
- Tree crown: The crown of a pine tree is usually conical or pyramidal in shape. It’s important to capture the overall shape and density of the crown accurately.
- Bark texture: The bark of pine trees can vary in texture depending on the species. Some pine tree species have rough, scaly bark, while others have smoother bark.
By understanding these distinctive features, you’ll be able to draw pine trees with confidence and accuracy. Remember to observe real pine trees or reference images to capture their unique characteristics effectively. With practice and a keen eye, you’ll soon be able to create stunning drawings of pine trees.
Gathering The Necessary Drawing Materials
Gathering the necessary drawing materials is the first step in learning how to draw pine trees easily. By ensuring that you have the right tools and suitable paper or canvas, you’ll be well-prepared to create realistic and beautiful pine tree drawings. In this section, we’ll explore the importance of selecting the right drawing tools and choosing the appropriate paper or canvas.
Selecting The Right Drawing Tools
When it comes to drawing pine trees, having the right tools is crucial for achieving the desired results. Here are some essential drawing tools that you should consider:
- Pencils: A set of graphite pencils ranging from H (hard) to B (soft) will allow you to create different shades and textures in your pine tree drawings. The harder pencils are ideal for sketching light outlines, while the softer pencils are great for adding darker shadows and details.
- Erasers: Having both a kneaded eraser and a regular eraser will help you correct mistakes and add highlights to your drawings.
- Sharpener: Make sure to have a good quality sharpener to keep your pencils sharp for precise lines and details.
- Blending tools: Blending stumps or tortillons can be used to create smooth transitions and textures in your pine tree drawings.
Choosing The Appropriate Paper Or Canvas
The surface you choose for your drawings can greatly affect the final outcome. Here are some factors to consider when selecting the appropriate paper or canvas:
- Paper weight: For pencil drawings, a medium-weight paper (around 80-100 lb) is generally suitable. It should be thick enough to handle erasing and shading without tearing or smudging.
- Texture: Textured paper can add a unique and realistic feel to your pine tree drawings. Consider using a paper with a slight tooth or grain for added visual interest.
- Canvas: If you prefer working with paints or want a more traditional look, you can opt for a canvas. Canvas provides a sturdy and durable surface for your pine tree artwork.
By selecting the right drawing tools and choosing the appropriate paper or canvas, you’ll set yourself up for success in drawing pine trees with ease. Now that you have gathered the necessary materials, let’s move on to the next step: sketching the basic structure of a pine tree.
Step-by-step Guide To Drawing A Pine Tree
Drawing a pine tree may seem daunting, but with the right techniques, you can easily create a beautiful representation. In this step-by-step guide, we will walk you through the process of sketching the basic outline, adding details to depict the texture and shape, and finally emphasizing the branches and needles of the pine tree. Let’s get started!
1. Sketching The Basic Outline Of The Tree
Begin by sketching a simple triangle shape that will serve as the main body of the pine tree. Make sure the base of the triangle is wider than the top, as this is characteristic of pine trees. Use light, curved lines to create the outline, allowing for slight variations in width to add dimension to the tree.
Next, draw a vertical line through the center of the triangle to represent the trunk of the tree. Connect this line to the base of the triangle with short, horizontal lines, indicating the roots. These lines can be irregular in length and shape to create a more natural appearance.
To complete the basic outline, add a few curved lines on either side of the triangle to represent the branches. Keep these lines evenly spaced and vary their length to create a balanced and realistic tree shape.
2. Adding Details To Depict The Texture And Shape Of The Pine Tree
Now that you have the basic outline, it’s time to add details that will bring your pine tree to life. Start by drawing small, triangular shapes along the branches, using short, curved lines to represent the needles. These shapes should be slightly elongated and overlap each other to create a fuller appearance.
Continue adding needle-like shapes in clusters along the branches, paying attention to the natural flow and direction of the needles. Vary the size and density of the clusters to give your tree depth and texture. Remember, the needles should be longer and denser towards the ends of the branches.
To enhance the texture of the tree, you can also add small, irregular shapes on the trunk and branches to represent the bark. Use short, diagonal lines to create these shapes, and vary their size and direction. This will add further realism to your drawing.
3. Emphasizing The Branches And Needles Of The Pine Tree
Lastly, it’s time to emphasize the branches and needles to make your pine tree visually striking. Use bolder and darker lines to outline the branches, adding thickness to give them volume. Remember that branches closer to the foreground should be more defined, while those in the background can be lighter and less detailed.
To make the needles appear more defined, go over the initial sketches with bolder lines. These lines should follow the contours of the needle clusters and provide definition. For added depth, carefully blend some shading into the areas where the needles overlap or appear denser.
Don’t be afraid to experiment and adjust as you go. Drawing trees allows for creativity, so feel free to add your personal touch and style. With practice, you’ll be creating realistic and captivating pine tree drawings in no time!
Enhancing Your Pine Tree Drawing
Now that you have mastered the basics of drawing pine trees, it’s time to take your skill to the next level. Enhancing your pine tree drawing can make it more realistic and visually appealing. In this section, we will explore different techniques to bring your pine tree to life.
Experimenting With Different Coloring Techniques
Coloring your pine tree drawing can add depth and dimension to the artwork. By experimenting with different coloring techniques, you can create a sense of realism and visual interest. Here are a few techniques to try:
- Layering: Start by choosing a base color for your tree trunk and branches. Then, gradually layer on additional shades of brown and green, blending them together for a more textured look.
- Gradient Effect: Create a gradient effect by using lighter shades of green at the top of the tree and gradually transitioning to darker shades towards the bottom. This technique can give the illusion of light and shadow.
- Texture with Cross Hatching: Add texture to your pine tree by using cross-hatching techniques. This involves drawing a series of parallel lines that intersect each other, creating a textured effect.
Adding Depth And Dimension To Your Drawing
To make your pine tree drawing pop, it’s important to add depth and dimension. This can be achieved through various techniques:
- Highlighting and Shading: Use lighter shades to highlight areas where light hits the tree, such as the tips of branches. Use darker shades to create shadows and add depth.
- Perspective: To create a sense of depth, vary the size of branches as they recede into the distance. Thicker and darker branches can be drawn in the foreground, while thinner and lighter branches can be drawn in the background.
- Foreground and Background: Consider adding elements such as other trees, mountains, or a cloudy sky in the background to create a sense of depth and make your pine tree the focal point.
Remember, practice makes perfect. Don’t be afraid to experiment and try different techniques to enhance your pine tree drawing. With time and practice, you will develop your own unique style and create stunning pine tree artworks.
Tips For Drawing Pine Trees Realistically
Learn how to draw pine trees easily with these helpful tips. Whether you’re a beginner or looking to improve your skills, these techniques will help you create realistic pine tree drawings. Check out video tutorials on YouTube or step-by-step guides on Pinterest to get started.
Observing Real-life Pine Trees For Inspiration
One of the best ways to learn how to draw pine trees realistically is by observing them in real life. Take a walk in a nearby park or forest and spend some time observing the unique characteristics of pine trees. Notice the shape of the branches, the texture of the bark, and the arrangement of the pine needles. By immersing yourself in the natural environment, you will gain a better understanding of the details that make pine trees distinct.
Practicing Patience And Attention To Detail
Drawing pine trees realistically requires patience and attention to detail. Start by sketching the basic shape of the tree trunk and branches. Pay close attention to the angles and curves, as they can greatly affect the overall appearance of the tree. Once you have the basic structure in place, add the pine needles in a systematic manner. Take your time to carefully observe the angles and lengths of the needles, as well as their arrangement on the branches. Don’t rush the process, as the more attention you give to the details, the more realistic your drawing will be.
Useful Resources:
- Video tutorial: How to Draw Pine Trees Easy
- Step-by-step guide: Step by Step Drawing a Pine Tree
- Quick tips: The Easiest Way You Can Draw Trees!
Remember, practice plays a vital role in improving your drawing skills. Set aside regular time for practicing and don’t be afraid to make mistakes. With each attempt, you will gain more confidence and your drawings will become more lifelike. So grab your pencils, head out into nature, and start capturing the beauty of pine trees with your artistic skills!

Credit: www.reddit.com
Frequently Asked Questions On How To Draw Pine Trees Easy
How Can I Easily Draw Pine Trees?
To draw pine trees easily, start by drawing a long, curved trunk, then add angled lines for branches. Add triangles or lines for the foliage, and don’t forget to include small details like pine needles and cones.
What Are Some Tips For Drawing Realistic Pine Trees?
For realistic pine tree drawings, pay attention to the texture and shape of the branches. Use shading to create depth and highlight the details like the rough texture of the bark. Study reference images of pine trees for inspiration.
Are There Any Beginner-friendly Tutorials For Drawing Cartoon Pine Trees?
Yes, there are plenty of beginner-friendly tutorials available online. Check out YouTube channels like DoodleDrawArt for step-by-step instructions on how to draw cartoon pine trees. These tutorials are great for kids and beginners alike!
Conclusion
Drawing pine trees can be a fun and easy task. With the help of step-by-step examples and video tutorials, anyone can learn to create realistic pine tree drawings. Whether you are a beginner or looking to improve your skills, these resources provide the guidance needed to create beautiful pine tree illustrations.
So grab your pencil and get ready to unleash your creativity by exploring the various techniques and styles available. Happy drawing!

